

If you’re a nail enthusiast or someone who struggles as a nail-biter, the nail world has evolved with a game-changing option: builder gel. Known for its ability to strengthen, lengthen, and help your nails grow with added thickness and durability, this revolutionary nail polish has quickly gained popularity among nail technicians and clients alike. Whether applied to your natural nails or extension tips, builder gel works as a protective overlay that reinforces weak nails and helps them grow perfectly well.
Often referred to as BIAB (Builder In A Bottle), this type of manicure can be a lifesaver if you’re looking for a chip-resistant solution that can last anywhere from three to five weeks on average. Compared to other nail extensions like gel extensions, dip powder nails, or acrylic nails, builder gel polish offers a more natural look while still providing the strength you need.
Its versatility makes it ideal for repairing damaged nails and encouraging growth, making it a top choice for those who want to embrace natural-looking nails with proper care. As the nail industry continues to expand its options, more people are becoming curious about what is builder gel and how builder gel works and why it’s considered so good for your nails
Table of Contents
ToggleWhat Is Builder Gel?

Builder gel is a versatile product in the nail polish world. It is known for its thicker viscosity than regular bases or color gels, allowing you to build up a solid structure that gives your nails the strength they need to grow without breaking. Available as either a hard gel or semi-hard formula, it can be soaked off with acetone if it’s flexible enough. Applied in layers—including a topcoat for an attractive finish that protects against chipping this thick gel can be used for short nail extensions or as an overlay on the natural nail to add extra strength and durability.
Nail technicians often use it with tips or forms to create flawless extensions and a smooth apex for a structured overlay. Its thicker consistency, though thinner than Magic Extender Gel, makes it ideal for adding structure while remaining easy to apply after a few tries, even if it’s fiddly the first time. With a range of neutral colors like Clear, White, Light Pink, Peach, Blush, French Rose, and Laid Bare, it allows you to create any style you desire—making it a true nail-saver.
How Do You Apply Builder Gel?
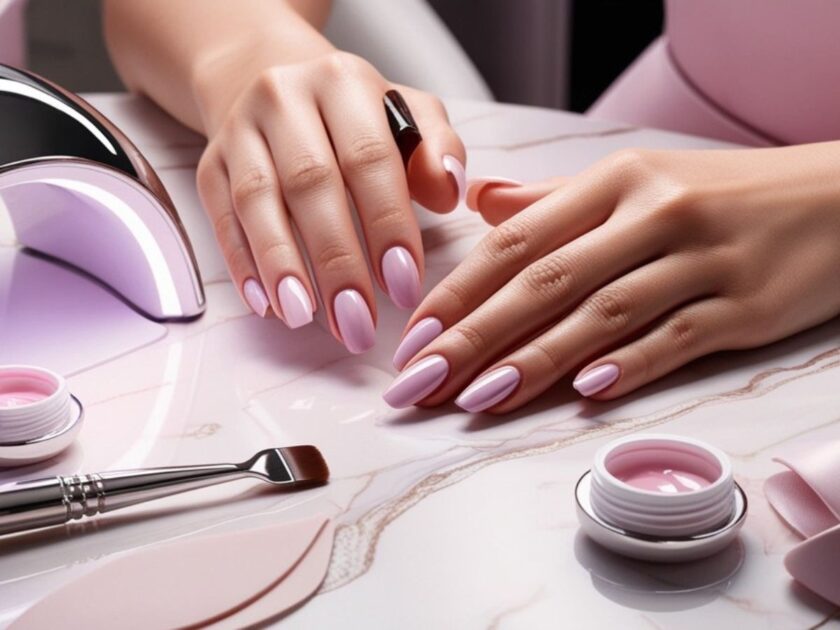
Applying builder gel requires following a careful process because of its thicker viscosity. To get the best results, it’s essential to apply it in a structured manner to prevent cracks or lifting. I remember when I first tried it—the gel felt tricky to handle, but after watching a builder gel application course, I learned how to do it properly.
The key is to build up an apex for added strength and use a file safely without damaging the natural nail. When done nicely, the method feels seamless, just like in the Gel Manicure Masterclass 2.0. I love doing fills because they keep my nails feeling strong and help me avoid an acetone soak-off, which often leaves my nails feeling dry and weak—especially since acetone is such a harsh product.
Here’s a simple step-by-step guide to applying builder gel:
- Step 1: Begin with your usual nail prep, then apply a thin layer of base coat to the natural nails (only if using a colored Builder Gel—skip this for the clear option), and cure it under a Mylee LED Lamp for 60 seconds.
- Step 2: Once cured, place a paper form under the nail for shaping.
- Step 3: Gently apply a layer of builder gel, allowing it to float over the edge of the nail and onto the form.
- Step 4: Cure for another 60 seconds and repeat with additional layers until the nail extension feels strong enough.
- Step 5: Add a thicker amount of gel polish at the apex to reinforce the structure, a helpful trick to avoid lifting. Finally, remove the paper form and admire your flawless finish.
This method works together so well, and with practice, you’ll nail the exact process effortlessly.
Also Explore: Gel Overlays on Natural Nails: The Secret to Perfect Nails?
How Does Builder Gel Differ From Other Manicure Types?
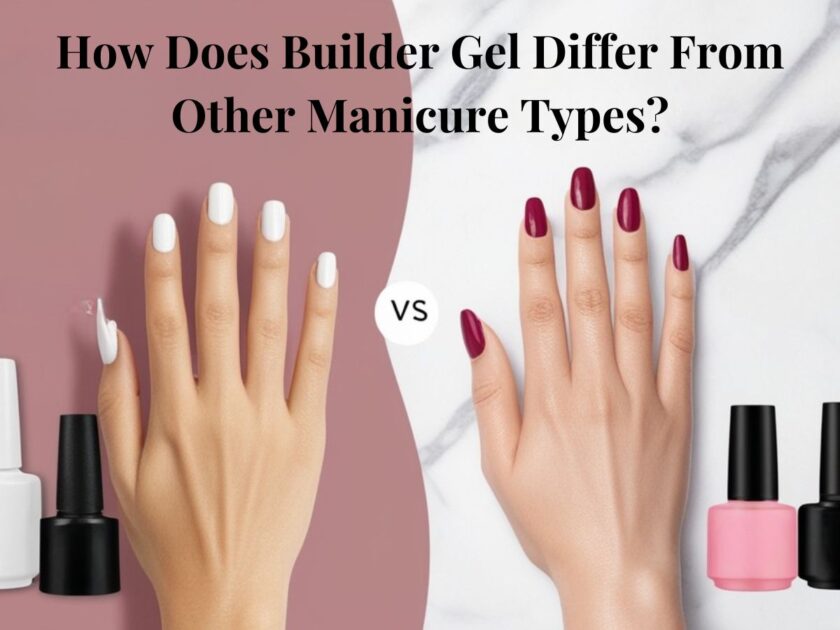
When comparing builder gel nails to other popular options like gel extensions, dip powder nails, acrylic nails, or gel nail polish, the biggest difference lies in how they protect and strengthen your natural nails. While each technique caters to different styles and personal preferences, builder gel is known for maintaining nails in good condition by providing a strong, flexible layer that supports growth.
Unlike acrylic nails or dip powder nails, which can feel heavy and require more upkeep, builder gel feels lightweight and durable. It also requires less work to apply and is easier to remove without causing damage, making it an ideal choice for those who want a balance between durability and natural beauty.
Builder Gel vs Gel Extensions
Gel extensions are known for being quick and convenient, using pre-made tips that mold easily to the natural nail and are secured with a gel adhesive before being cured under UV light. In contrast, applying builder gel or hard gel takes more effort, involving steps like cleaning, shaping, and buffing, followed by brushing the polish in a specific motion to create a smooth finish.
The key advantage of builder gel is its ability to offer more durability, flexibility, and customization to match your natural nail shape. Unlike gel extensions, builder gels help maintain natural nail health, encouraging them to grow stronger over time. Whether using soft gel, semi-hard gel, or hard gel, builder gel allows for sculpting, applying over a tip, or creating a structured manicure that strengthens the apex and supports long-term nail growth
Builder Gel vs Dip Powder
When comparing builder gel and dip powder, both offer flexibility and durability, adding thickness and strength to the nail while being chip-resistant and long-lasting. However, builder gel gives a more natural-looking finish, while dip powder can appear bulkier. The application process for dip powder is more involved—it starts with a base coat, followed by dipping the nail into colored powder and then sealing it with a top coat. The removal process is also more demanding, requiring nail filing and soaking, which can weaken nails over time, leaving them brittle and weak.
A major perk of dip powder is that it doesn’t need UV lighting for curing, unlike builder gel polish. While dip powder offers a convenient no-cure nail enhancement and solid durability, it lacks the buildable and flexible nature of builder gel, which allows for a smoother, customizable finish—a quality I prefer for achieving a more polished and natural look
Builder Gel vs Acrylic Nails
Builder gel offers more flexibility than acrylic nails, making it less likely to break if you accidentally hit a hard surface, which gives it a chip-resistant reputation. While acrylic is known for creating strong nails—ideal for nail extensions or tips—the rigid structure can be more damaging if a nail breaks. In contrast, builder gel in a bottle applies a light, thin coat that’s faster to apply and allows your natural nails to grow and stay healthy.
It’s also a better choice for those who want to lengthen and strengthen their nails without the excess nail filing that acrylic requires during application and removal, which can thin and potentially damage the nail. Plus, with builder gel’s durability and ability to withstand wear and tear, it feels more comfortable and less harsh on your hands.
Benefits Of Using Builder Gel

Builder gel is a fantastic way to keep your nails looking prettier and feeling stronger. It helps strengthen your natural nails, encouraging them to grow healthier over time. One thing I love about using nail builder gel is how it adds noticeable smoothness to the surface, giving your nails a clean and polished finish. It’s also surprisingly easy to use—you can apply it directly onto your nails or use tips for an added extension or enhancement. This flexibility makes it perfect for creating the look you want, whether you’re after a natural vibe or something more dramatic.
Builder gel is a type of gel that’s similar to acrylic, allowing you to apply the builder gel directly as gel on your natural nails to keep your natural nails strong and long; it’s perfect for nail art, easy to use as gel at home, and cures under a LED or UV lamp discover why builder gel is good for both beginners and pros
How Do You Remove Builder Gel?

Removing builder gel can be done at home if you’re using soak-off formulas. The easiest method is to soak your nails using foil, acetone, and cotton, just like you would with regular gel polish. Simply soak a cotton pad in acetone, place it on your nail, and wrap it with foil for about 15-20 minutes until the gel softens. Once it’s ready, you can gently scrape it off without damaging your natural nails. This method is simple and effective, especially if you’re looking for a convenient at-home solution.
However, if you’re dealing with hard gel or tougher layers of nail polish, it’s best to visit a salon where a professional can safely handle the removal process. Hard gel must be filed off, as it won’t dissolve in acetone. If you’re experienced with an e-file or electronic nail file, you can try removing it yourself, but it requires a steady hand and careful attention to avoid damaging your nails. I’ve tried both methods and while the DIY approach works for softer gels, I always prefer a professional touch for hard gels to keep my nails healthy and strong
Conclusion
To make builder gel last longer, it’s important to follow the right aftercare steps. A reputed nail technician will use the correct lamp for the process, ensuring the best results. Regularly applying cuticle oil keeps nail beds healthy, while wearing gloves during chores protects nails from harsh chemical products. Avoid filing nails unless necessary, as it can weaken them over time. By following these best practices, your nails will stay strong and beautiful.
FAQ's
When builder gel is applied and removed properly, it shouldn’t cause damage to your nails; in fact, it’s designed to strengthen weak nails and support healthy growth. However, improper application or harsh removal techniques, such as excessive filing, can lead to nail thinning and even potential damage to the nail bed. While the polish is quite effective at re-strengthening fragile nails with minimal damage, the soaking process in acetone can leave nails feeling dry and brittle. To avoid this, it’s best to take a break between applications, allowing your nails to breathe and recover from the effects of budge-proof layers and acetone exposure. Applying the gel with careful, horizontal strokes ensures the polish adheres correctly and helps maintain nail health over time.
Sometimes, using builder gel can leave your nails feeling weak, especially if the chemical ingredients in the formula include irritants, toxic substances, or drying alcohols. These elements can hurt the health of your nails when they come into contact with the nail surface. From personal experience, I’ve noticed that if the product isn’t applied or removed carefully, these harsh ingredients can strip moisture from the nails, making them feel brittle and more prone to damage.
Builder gel can last anywhere from three to five weeks thanks to its strong, viscous texture, which makes it less prone to lifting than regular gel nail polish. Whether using hard gel or standard builder gel, it can be filled to avoid applying a completely new set every time. A proper manicure involves filling the outgrowth at the base of your natural nails and covering the space with fresh gel to keep the nails looking fresh and healthy. On average, it lasts around two to three weeks, but this depends on the brand and how well a skilled technician has applied it. For optimal results, always follow the application instructions of your preferred brand and avoid mixing products, as it can affect the finishing—especially when combining gels with a different top coat. Using a proper LED or UV nail lamp for the required time also ensures the gel stays strong and your base remains healthy.

At Nails Glamour, we celebrate the art of nail beauty. We bring stylish nail ideas, step-by-step tutorials, and pro tips to keep your nails on point. Stay updated with the latest trends, product recommendations, and DIY inspiration to keep your nails looking flawless every day.